


Clicking on the screen shots will expand them to full size.
Repository Control
This short HowTo discusses setting the Peripheral Repository Path. You can set the path when creating a new project, or during a project session.
Note: This HowTo uses Xilinx EDK version 8.2i
Setting the Path at Project Creation
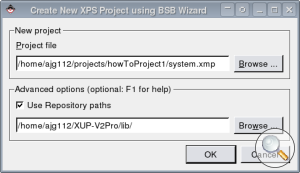
When creating a new project, you can set the Peripheral Repository Path.
Setting the Path During a Project Session
When opening an archived project, it is possible that the originally set Peripheral Repository Path no longer exists. In this case you'll need to reset the path.
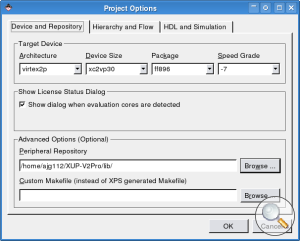
Select Project->Project Options. Within the Device and Repository tab there is a text box to set the Repository Path.
